|
Getting Started Flasking OrchidsBotany & Horticulture Articles Sep 06, 2021 by Tectract Getting ready to flask an orchid seed pod for the first time? This blog post will give you some invaluable advice and a list of materials, along with a great recipe for orchid germination agar. tags: #orchids #agar #recipes #flasking #tools #utensils #gear #getting-started #protocorms #caviar #phytotech #labs #sterile #procedures |
|||||||||
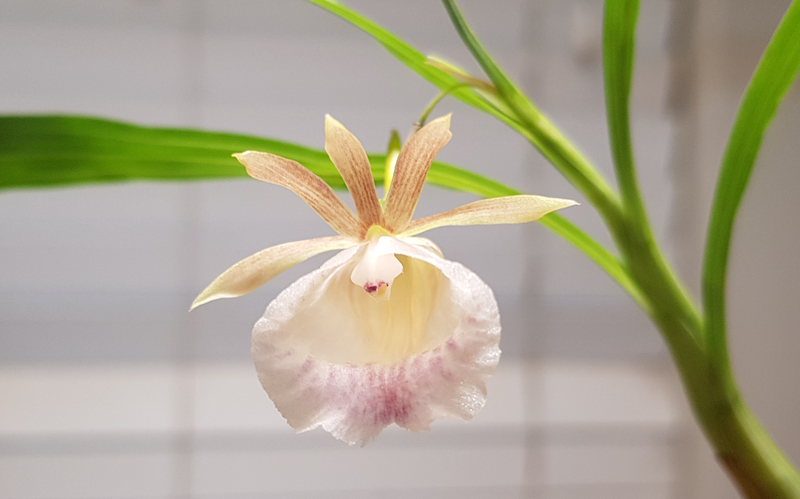
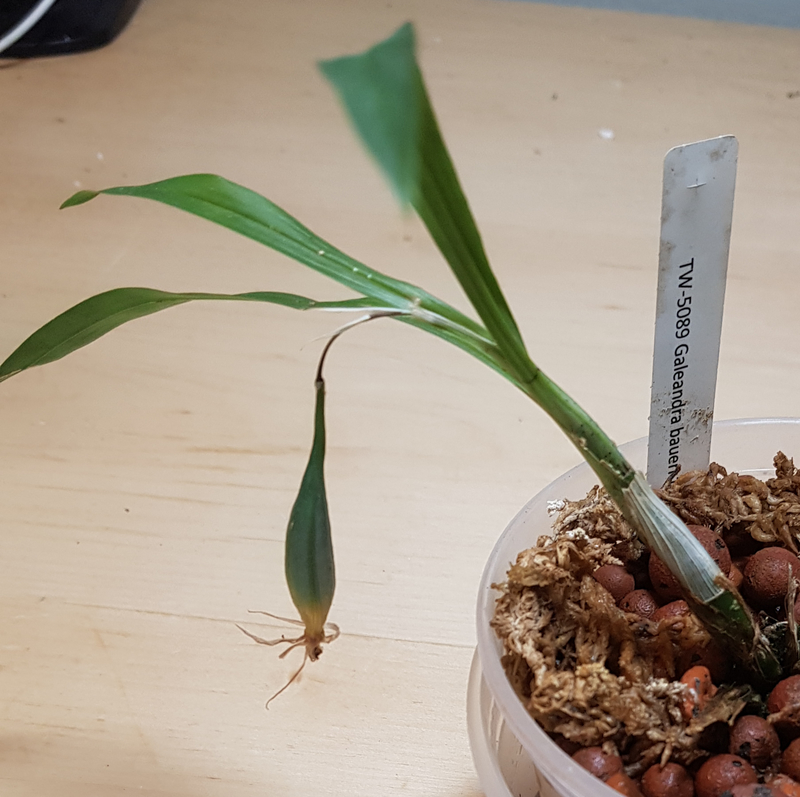
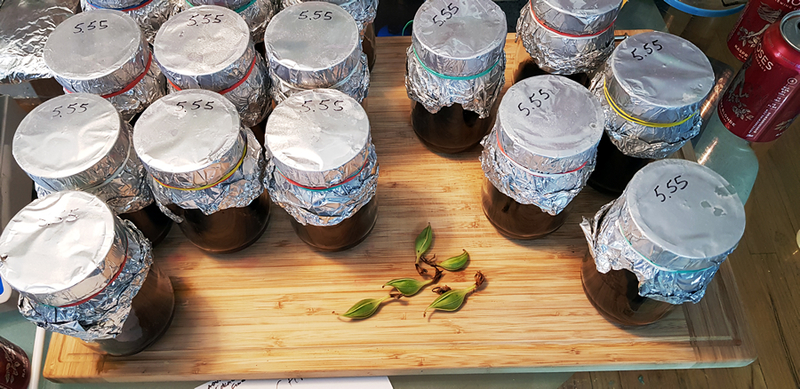
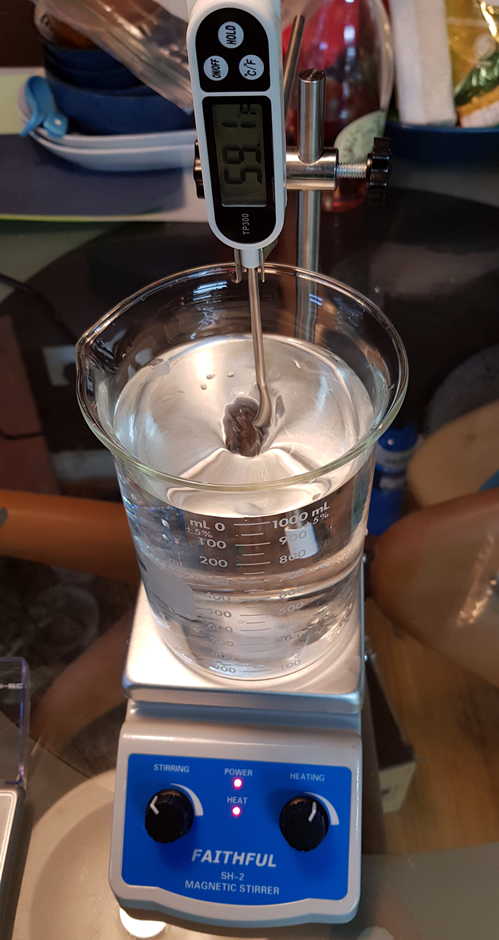
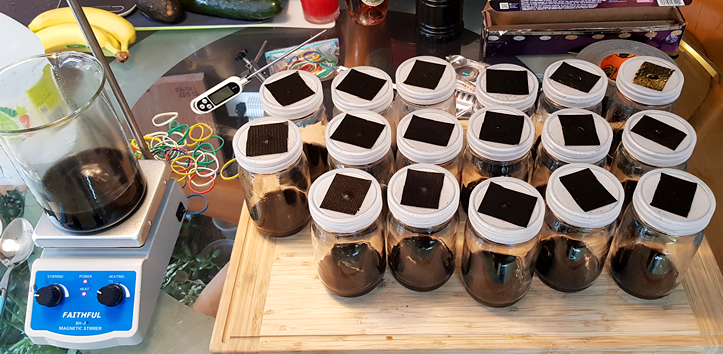
Succesfully pollinating an orchid for the first time is a big breakthrough in your orchid cultivation career, congratulations! It took me 15 years before I successfully pollinated a rare orchid for the first time, it was a Galeandra. It's so exciting to find that seedpod growing behind your flower, and to learn that your plant is now mother to thousands and thousands of teeny, teeny seeds. So you've decided to try flasking at home. Excellent. We are the musicmakers, we are the dreamers of dreams. I'm here to tell you that, with a little knowledge, a few basic materials, and a keen eye towards cleanliness, you can absolutely succeed at home orchid flasking!! Lets start with some supplies lists. Check your list to see what you might need to get started, and for stuff that you might find useful around the lab. Supplies for Making Agar: 22qt Pressure Cooker (autoclave 1L of agar at a time, 12x 16oz widemouth jars) Hot Plate Magnetic Stirrer (absolutely worth the $70, saves you SO much time & effort) Magnetic Stir Bars (these large ones are great even for stirring 2L batches) Digital Thermometer (fits onto the above magnetic stir plate, no extra pieces needed) 2000ml Thick Graduated Glass Media Bottle with Screw Cap (ou will autoclave the media in these 1L bottles, they have a nice flat bottom for the stir rod to work well on your stirring heat-plate) pH measuring tool with calibration kit, which you should CALIBRATE every time you make agar! Lab Scale 5000g/0.01g High Precision Digital Scale, that can go down to 0.01g precision, and up to 2000+g capacity Transfer pipettes (a MUST for adding single drop-by-drops of your pH buffers) Karat 16 oz PP Deli Containers (Case of 500) (germination or "mother flask" containers) Karat 24 oz PP Deli Containers (Case of 500) (replate flask containers) Karat Deli Container LIDS (Fits both 16oz and 24oz containers) (Pack of 500) (lids for PP flask containers, sadly you have to buy them separately!) Shrink-Wrap Bands to Fit Deli Containers (for fast and easy sealing of the lids of your replates in particular, you can use flex-wrap silicon tape also here) Flex-Wrap Silicon Tape (for wrapping the lids of the MOTHERS after flasking, to help prevent contamination and reduce need for heat-shrink wrap, seeds don't like heat!) Silicon Bottle Brush (for getting those inner corners of the media jars really truly clean) Calcium Nitrate 15.5-0-0 Fertilizer (baby plants love calcium, this will definitely boost seedling growth) Albion Metalosate® Calcium™ - Amino-Calcium Foliar 4.25-0-0 (even stronger industrial calcium booster, absorbs directly through leaf & stem tissue, great for both flasking & nursery compots, sold right here at Tectractys!) 20-20-20 Liquid Fertilizer Superthrive Original Formula Liquid Fertilizer Supplies for Flasking / Replating Process: Blunt-Tip Syringes (perfect for dispensing sterilized seed into the flasks) Steel Microspatula 4-Piece Set Tools Dental / Surgical Instruments (cheap microspatula set for replates) Bone Grafting Instruments - Dental Implant Graft Collector Scraper ("bone scraper scaler" tool for replates and gentle protocorm transfers / spreads - I LOVE THIS TOOL!) Extra-Long Stainless Steel Tweezers (super useful for placing plants into "liquor bottle" style flasks) Extra-Long "Cocktail" Spoons (Great for quickly reaching into a flask to scoop out a little fungal area to try and save it) Hypochlorous Acid Generator (cheap tool to make potassium hypochlorite / hypochlorous acid, for sterilizing seed and also general bleach disinfectant in a pinch) Chlorine Test Strips (to test the strength of your hypochlorous acid / bleach, a good strength recommended for sterilizing seed is approximately 600-800PPM) Potassium Chloride Salt - 1lb (cheap potassium salt for making potassium hypochlorous acid bleach solution) 50mL Plastic Centifuge Tubes (for autoclaving distilled water inside of, for a seed "wash" step during the germination plate creation process) Phemomo Mini Handheld Thermal Printer (for printing flask labels instead of writing them by hand!) Carrying Case for the Phemomo Thermal Printer (to store the printer and any extra sticker label rolls) Large Label Sticker Extra Rolls for the Phemomo Printer (these are the nice big sticker label rolls for the Phemomo thermal printer) General Lab Supplies: Nitrile Gloves (I use these when scrubbing and bleaching the jars, before pouring the solution) Arm Sleeves (so you don't need to wear a labcoat to help cover your arms in front of the flow-hood) Particulate Face Mask (for working with seed samples, so you don't accidentally breath on them) Rack Lighting: Gardeners's Supply T5 Retrofit LED Grow Lights (perfect for fitting into T5 lighting fixtures, with a nice diffuser in the plastic so you don't see LED "points") SunBlaster High Output T5 Fixture / Reflector (for lighting your racks, I like two per row but even up to three would be great) VIVOSUN 200W Grow Light Panel (at the top of your racks, just stick a couple of these mounted on the ceiling and they can light up the whole room) *Disclaimer: I'm an Amazon Affiliate and I make a small commission if you click on these links and then purchase a product, so please DO IT! Product prices on Amazon are not affected by whether you reach them through an Affiliate Link, I get the commission from Amazon, not from the buyer or seller. Ok great, so you have all the beginning supplies you need to get started proper. Lets talk agar, pH buffers, jars/lids, and gloveboxes! When I talked to Fred Clarke from Sunset Valley Orchids, renowned breeder of cattleya and catasetums, he mentioned to me that he simply used a very standard P668 blend at half strength, with sugars added back in from the dilution process, adjusted to a pH of 5.4 to 5.6. He also said he uses Beechnut Banana Baby Food. This is an absolutely great beginner mix, which can be used for a wide variety of orchids. Cattleyas, Catasetum, and Laelias go crazy in this mix, and it's a great starting point for a lot of species. The "P" stands for Phytotech Labs, and the 668 is a very standard pre-mixed orchid media recipe that they sell, it comes with colloidal activated charcoal already mixed in, but you DO have to add your own agar. Here's the recipe: Standard P668* Orchid Medium Agar Recipe - 1/2 strength Phytotech Labs P668 Orchid Maintenance Medium with Charcoal, Without Agar (13.67 g/L) - 10 g/L raw sugar (sucrose) - 1/2 jar (2 tablespoons) Beechnut Banana Baby Food - 4.7 g/L Phytotech Labs A111 Micropropagation Grade Agar So to make 1L of standard P668* agar, you will start with 1000mL (1L) of water, then add 13.67 grams of P668 powder, 10 grams of sugar, and 5.5 grams of agar agar. Bring your media up to 100ºF, while stirring a LOT (this is where the heated stir-plate comes in handy), to completely blend and heat the agar, to prepare it to go into your pressure cooker. The agar will melt at 120ºF, and the internal termperature of your pressure cooker will be 121C at 15 PSI, so it will still be warming up when it's being autoclaved / sterilized. I do a standard 18min cycle, which means I BEGIN the 18min countdown once the pressure cooker has reached 15 PSI and is releasing a steady stream of vapor (full normal pressure). Note: you can use 50mL of coconut water in this recipe for mother plates, also. Ryan's Mix General Agar Recipe (RMIX) - Phytotech Labs P668 Orchid Maintenance Medium with Charcoal, Without Agar (13.5 g/L for mother flasks, 18g for replates) - 10 g/L raw sugar (sucrose), you can add a few extra grams for replate mixes - 1/2 jar (2 tablespoons) Beechnut Banana Baby Food - 1 heaping tablespoon of plain tomato paste - 4.7 g/L Phytotech Labs A111 Micropropagation Grade Agar - 50 ml/L coconut water (for mother flasks only - not needed for replates) - a pinch of calcium nitrate OR amino-calcium OR both (per L, optional) - 3-5 drops of 20-20-20 commercial liquid fertilizer (per L, optional) - 2-3 drops of Superthrive, Original formula (per L, optional) - If you can't find Original Formula Superthive, just use a couple drops of a good seaweed / kelp fertilizer instead If you can't find Beechnut, you can just use any banana baby food, or finely mashed, slightly under-ripe bananas. I like to run them through a garlic press So to make 1L of RMIX agar, you will start with 950mL (0.95L of water), 50mL of coconut water (for mother plates), then add 13.5 to 18 grams of P668 powder, 10 grams of raw sugar, 4.8 grams of agar, banana, tomato paste, and the other optional ingredients. Bring your media up to 100ºF, while stirring a LOT (this is where the heated stir-plate comes in handy), to completely blend and heat the agar, to prepare it to go into your pressure cooker. The agar will melt at 120ºF, and the internal termperature of your pressure cooker will be 121ºC at 15 PSI, so it will still be warming up when it's being autoclaved / sterilized. I do a standard 18min cycle, which means I BEGIN the 18min countdown once the pressure cooker has reached 15 PSI and is releasing a steady stream of vapor (full normal pressure). Should you add sterile coconut water? YES probably, for most species to help germination and early rooting in the mother flask stage. Maybe no coconut, or only a little bit, for phals or paphs because it can (maybe) lead to proliferation in those species. Proliferation is when your orchid seeds don't develop into normal protocorms, but instead grow into an semi-undifferentiated replicating mass sort of like a tumor-looking thing, called a "Protocorm-Like-Body" (PLB). These PLBs can be valuable because they can be split, indefinitely, and grown out into many many plants which are all genetic clones of each other, so they are used sometimes in professional flasking labs producing many plants, and they want an exact color variation for mass-production and sales, usually in phalaenopsis but also vandas. Ok, so to add coconut water, add 50-100ml of the coconut water to your 950mL agar mix. This is a great growth hormone for most epiphytes! Note: You don't need sterile coconut water from a lab, you can just use coconut water that they sell for humans to drink, in the grocery store. This stuff has extra sugar also, it's OK. So now, RMIX at pH 5.3 is a great mix for most of my germination AND replates, and at 5.8 for some phals and phrags. Adult epiphytes really seem to like it, and grow well, and the extra bit of growth hormones seems to help the protocorms turn green and grow well early on, also. My mix is almost always a little low in pH and I bring it up carefully with a little baking soda diluted in water, and a calibrated pH meter. You can even grow cymbidiums and terrestrial species on this mix, but I highly recommend looking into Malmgren Mix or even the "cardboard" method for sowing terrestrials. Note on fungal and yeast contamination: If you use this recipe, there's a good chance you will suffer 10-20% contamination by yeast and fungus, depending on your environment and your sterile technique. In order to help prevent FUNGAL / YEAST contamination, you can try adding a SMALL ammount of benzoic acid (0.1g/L or less). I'm still experimenting with these additives and you should be especially careful adding them to germination media, and make sure you add the acids BEFORE you do your pH balancing (some or most of the acid will be lost by reduction during this process). Pouring and Autoclaving the Agar When you pour the agar, do not close the lids super-tight, really just tight enough to barely make a seal, then cover them and wrap them in aluminum foil, and rubber-band the foil onto the top of the jars. You want air to be able to flow OUT of the jars as they heat up in the pressure cooker, and then back INTO the jars as they cool down. The aluminum foil is mostly to help protect from germs or fungal spores coming INTO the jar, during the cooling off period. Once the jars are cool AND ONLY ONCE THE JARS ARE COOL, then you will tighten the lids, and let the agar sit for 2-3 days before using it, to make sure it's really sterile. Don't take off the aluminum foil until they are ready to use in your glovebox (or flow hood). IMPORTANT: If you accidentally tighten the jars BEFORE putting them in the pressure cooker, they can EXPLODE INSIDE!!! This is bad. More likely what will happen is that the plastic lids will pop off, possibly with some force, and make a huge mess everywhere, ruining the batch. ALSO IMPORTANT: If you accidentally tighten the lids onto the jars WHILE THEY ARE STILL HOT, they can IMPLODE!!! This is also bad. More likely what will happen is that the lids will "suck" onto the jars with incredible force, possibly distorting inwards, and they will become ATTACHED to the jars as if tightened on there by some sort of hulk-like superhero, and you will not be able to remove them without straps, generally ruining the batch. During the COOL DOWN of the pressure cooker, once you have reached 18 minutes and turned off the heat, it's desireable to bring the temp down quickly enough so that you can give the flasks a final stir (via agitation) before it cools, because the ingredients will separate to some extent in the flasks during the autoclave process. So, let out steam in controlled bursts of 8-10s from the pressure cooker release valve, every few minutes, until the pressure indicator drops and it is safe to open. It usually takes me around 15-20min to heat up before reaching pressure, 18 min cook, and then another 15-20 min to release steam and cool down. I take the jars out with hand gloved in a welders heat glove, DO NOT TIGHTEN THEM RIGHT AWAY, and give them a good circular agitation to re-stir the contents before setting the jars down, to let the agar cool and solidify for at least 8 hours before trying to tighten or move them. UPDATE: I have switched to simply autoclaving the agar in one big bottle, then pouring it into polypropylene "deli cups", inside the flow hood. This greatly reduces the time of cleaning the reusable jars, and the waste and cost of the aluminum and rubber bands. I simply soak the plastic deli cups in bleach-water and stack them in the flow hood a few minutes before the agar is ready to come out of the flow hood, and I give it a good 10 minutes to cool before I pour it. So much faster and I get almost no contamination :) Standard pH Buffers - pH UP (ammonia OR baking soda) For ammonia (NH3): You can buy this at your local drugstore. Dilute the ammonia around 50% in purified water, and add DROP BY DROP as you measure the pH, as needed. DO NOT use potassium hydroxide (KOH) as your pH UP buffer, because it will mess up your potassium levels and make them too high. For Baking Soda: get it in the baking aisle at your supermarket. Just put some in cold water, and add it drop by drop. Not too strong! Works like a charm. - ph DOWN (citric acid) You will not need pH down for this process, your agar should be around 4.2 or 4.3 after mixing and then you will bring it up to 5.3 (for epiphytes), or 5.8 for paphs/phrags or terrestrials. What is the best pH for your orchids? The guys at Phytotech Labs will tell you they usually adjust to 5.4, while Fred Clarke says 5.4-5.6 for most species. 5.4-5.6 is a perfectly good range for most species, and it should be your starting point. I've had success with phalaenopsis a little higher, at 5.9. For terrestrials, you also want to be a little less acidic, so around 6.0 is great. IMPORTANT: If you FORGET TO ADJUST THE PH, and just go on making your agar and then start putting it in the jars, putting on the foil, then autoclaving it, and letting it set, then when you get to the final labelling step where you label the jars with what agar, what pH, and what day you made the agar, you will feel very regretful at having RUINED THE BATCH and having to start all over again!
For the valuable "mother" flasks (flasks from which replate flasks will be produced), which you will be producing, I adore the widemouth 16oz glass culture vessels from Phytotech Labs. These come with polypropylene (#5) plastic lids which can withstand the pressure-cooking well. You can also simply find some mason jars, and some fitting polypropylene lids, just on Amazon or eBay, but if you are making an order from Phytotech anyhow, might as well pick up the good widemouth ones with fitting lids. My average expenditure on these nice glass culture vessels is $2-3 / jar, so it's not a major expense, but it does add up. I've been collecting mason jars when I can find them on special discount in stores, too. This will be your new life, hoarding jars For replates, and just a cheaper option in general, you can go with polypropylene "soup cups" used in delis, I find the 12oz option to be nicer than the 16oz option, but you have to be a little more careful pressure-cooking these things, they can melt if you are not careful adding enough water, or if you let them go too long! The plastic deli cups do have a nice big footprint for plenty of seed to happily grow in, but that also means less of them will fit into your pressure-cooker at a time. This is why you should also buy another pressure-cooker, of course. Before you pour the agar, it's important to REALLY TRULY wash, then BLEACH, then rinse the jars, and turn them over onto a paper towl and let them dry out for a few minutes. This is a pre-sterilization routine, so your goal is to remove as many germs and fungal spores as humanly possible from those jars and lids, before you pour the agar. You won't be 100% successful, but with good practise, the autoclave will get you that last final step towards a truly sterile environment, for your babies to live in, inside that flask. 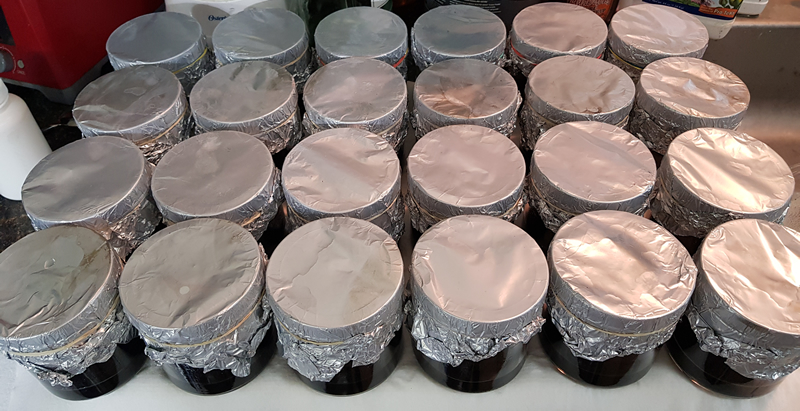 Once cooled, the flasks are tightened and moved to a cool, dark, dry shelf to sit for at least 2 days to make sure they remain sterile before flasking the seedpod What About the GloveBox? A great glovebox can be found at Target, with already-attached inner (blue) foam lining that will seal the box airtight. Try to find that one if you can, makes things so much easier! If you have to foam-seal your own box, a good foam is the tape that they use to insulate windows, and you should hot-glue it into the lid securely. You'll need BIG tube components to fit your arms in, but also small enough so that you can get some good long rubber gloves securely wrapped onto, on the inside, so go scrounge at your local hardware store. You'll want two pieces for each arm, for the inside/outside and they should screw together. You can cut the holes to fit with a dremel tool. Here's a pic of mine: 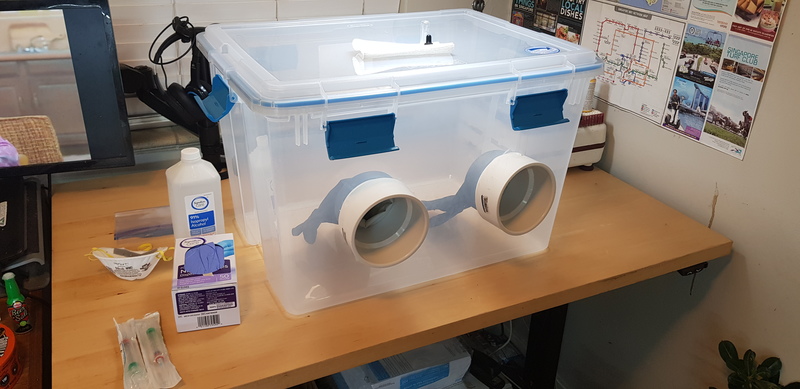 Some people like to put the lid part as the bottom instead of the top. I found it more intuitive to do it this way. Besides, you'll be building a laminar flow hood soon, right? Steriliing the Seed and getting it actually into the flasks - Making "Mother" Plates: So you have some seed, some blunt-tip syringes, and a glovebox or flow-hood. You'll want to use one of these three solutions for sterilizing your seed: 1) Hydrogen Peroxide - H2O2 (3%) - This works but it's pretty harsh on organic tissue. I might recommend diluting it down with 50% water, or using year-old hydrogen peroxide (which breaks down into water by about 30% per year). Put the seeds in the syringe, and then suck up some hydrogen peroxide into the syring and agitate periodically for 15 minutes. Then you can just put about 1ml of shaken-up seed and peroxide into each flask. The peroxide breaks down back into water with bright light so there is no "wash" step here, but you'll want to take your flasks and put them under very bright light for a good 20-30 minutes immediately after plating the seed, to deactivate it and prevent it from killing all the embryos. 2) Sodium Hypochlorite (regular store bleach) - Don't get the non-splash stuff, just the regular sodium hypochlorite bleach with no other additives, as possible. You should probably get the chlorine test strips (listed above) to check your bleach strength, you'll want it around 800ppm ideally. Using bleach requires a WASH STEP so you'll want to have some plastic ampules (centrifuge tubes listed above work great) to autoclave some distilled water in, and some autoclaved cotton balls on hand also. You'll put the seed into the syringe, suck up the bleach into the syringe with the seed, and agitate periodically for 10-15 minutes or until you see the seed visibly bleach. Some seed has a more fragile outter "sheath" which will break down really fast in bleach, others have a stronger woody outter sheath which can withstand the bleach better. There is a WASH STEP required for bleach sterilization, so, inside your flow-hood or glovebox, you'll want to let the seeds settle in the syringe (good seed should sink to the bottom), then carefully push out the excess bleach fluid into a sterile cotton-ball, and then suck up enough of the sterile autoclaved distilled water back into the syringe with the seed. You'll want about 1ml to maybe 1.5ml of water and seed for each mother plate. Make sure to shake it up and get them dispersed well before doing a few drops of water / seed into each mother plate. 3) Potassium Hypochlorite / Hypochlorous Acid (potassium bleach) - You want to be carefull with both hydrogen peroxide and sodium hypochlorite because they are rather harsh on organic tissue. The best option is potassium hypochlorous acid, which can really help boost your germination rate! It is a form of bleach that is less harsh on organic tissue than sodium hypochlorite or hydrogen peroxide, but it can be just as strong and you can even use it as a household cleaner and disinfectant just like regular bleach, however it only lasts around 24 hours and then turns back into water, so you have only a few hours to use it after you make it (with the hypochlorous acid generator and potassium chloride salt linked above). Again you'll want to test with your chlorine test strips to make sure it is around 800ppm, ideally. Follow the same procedure here as for the regular bleach: start by putting the seed into the syringe, suck up the bleach into the syringe with the seed, and agitate periodically for 10-15 minutes or until you see the seed visibly bleach. Be CAREFUL with this bleach because it can also destroy the sheath of fragile seed pretty fast if you don't pay attention. But in general, about 10-15 minutes should be enough. There is a WASH STEP required as with normal bleach, so you'll want to let the seeds settle in the syringe (good seed should sink to the bottom), then carefully push out the excess bleach fluid into a sterile cotton-ball, and then suck up enough of the sterile autoclaved distilled water back into the syringe with the seed. You'll want about 1ml to maybe 1.5ml of water and seed for each mother plate. Make sure to shake it up and get them dispersed well before doing a few drops of water / seed into each mother plate. When agitating the seed, it's good to put the cap on the syringe and hold it under pressure and under vacuum while shaking, to really try to get those micro-air bubbles off the seed surface with the pressure/vacuum and agitation motion. It is ok if there is a little extra water in the agar with the seed, but it shouldn't be floating. I usually dump out extra water from the agar before putting the seed-water solution onto the mother plate, but not always if there is not much. You don't want the agar to dry out, you want the seed to be sitting on a moist agar surface, not a dry agar surface, but not floating. I don't recommend using a heat mat for your flasks. I recommend just keeping them in a room that you can reliably keep between 65f (18C) and 75f (24C) temperature-wise. Any sudden temperature changes or swings outside of this temperature range WILL likely kill off most or all of your protocorms! So environmental control is IMPORTANT in the protocorm phase. Once they grow roots and shoots, they are much more forgiving and can be warmed up a little more and given more light. Moving on UP, to a LAMINAR FLOW HOOD! Once you have succeeded at flasking some seeds and you have done your first replates in the glovebox, you will get frustrated at the difficulty of working in a glove box, probably. You can invest in a nice laminar flow hood, or build your own. Here's a pic of our latest setup here at the Tectractys, LLC flasking lab, run under auspices of the Denver Hanging Gardens project! 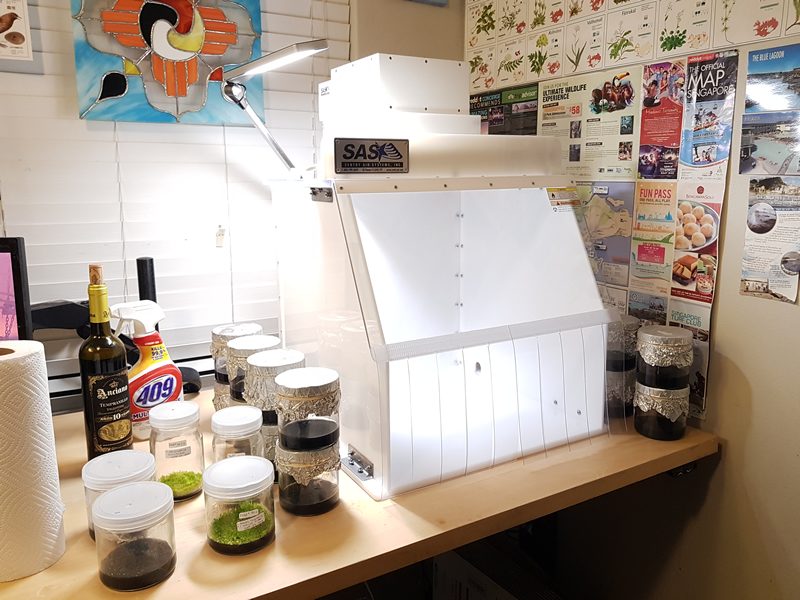 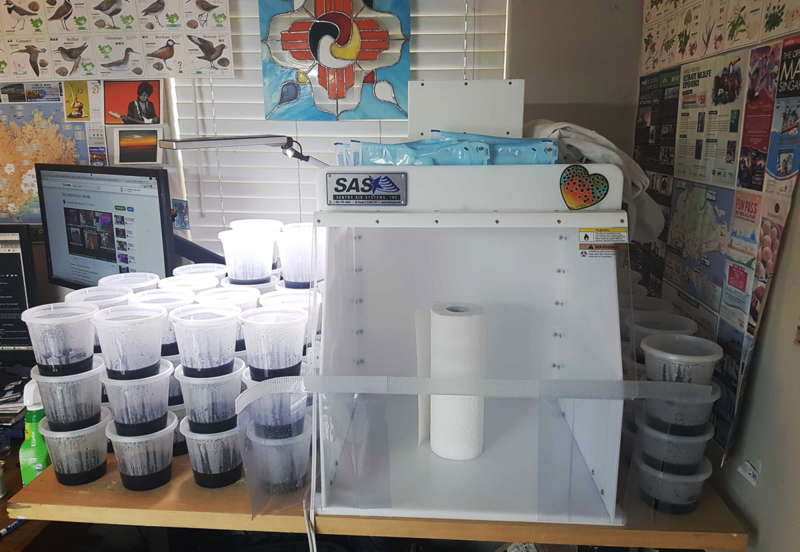 As you can see in this latest pic, I'm now using 16oz and 24oz "deli cups" for my agar. So, I cook up the agar, take it over to my flow hood, and then pour it into the deli cups and give them a few minutes, then seal them up and give them a final little circular stirring motion as I set them to cool on the desk. I don't autoclave the plastic deli cups, I simply soak them in bleach and then stack them up inside the flow hood while it is running, to keep everything sterile. This method allows me to make more agar, faster, bigger batches, more replates! I have move up to the 24oz deli cups for final replates because my greenhouse operator customers said they like big tall babies that are "touching the top" of these large cups. Once you have a full 24oz deli cup, it's ready to deflask, and/or sell to a greenhouse. It's important to cultivate relationships with greenhouse operators, flaskers, and orchid fanatics at large, to continue to be able to aquire and trade for new seed, and to be able to sell your flask if / when you decide to make your hobby into a business. QUESTIONS AND ANSWERS! Q: How long does it take for an orchid to go from seed to flowering for the first time? A: It can take anywhere from 8 months to 2+ years for a seed to fully develop in the flask and be ready for "deflasking", and then it usually takes another 8-12 months of growth to be able to flower. It depends on your skill as a flasker, replating the protocorms at just the right moment when they are first ready, having a good soft agar with a recipe that the species of orchid grows well in, giving them enough light and heat and a stable enough temperature during growth to help boost their growth, and even when all these things go just right, it still depends on the species and their individual growth rates. Laelia and Cattleya grows fast, Neofenitia grows slow, most other species are somewhere in between. I have absolutely shipped out happy flasks within 8 months of putting the seed onto agar, but that is an exception not the usual. On average I ship flasks at 12-16 months of growth. There are some NOTABLE EXCEPTIONS to the rule here! For example some tiny species will potentially flower in the first 12-14 months, while still in the flask. Miniature Cattleyas like Walkeriana are also sort of a "flasker's pet" because they are also known for flowering small and early, while still in the flask. Q: Can I give my flasks natural sunlight? What are the right light and temperature levels for my flasks? What type of grow lamps should I use for my flask? A: YES, flasks can handle natural sunlight, however you have to be really careful that they don't fry! I commonly put my flasks near a window where they will get 15-20 minutes of sunlight in the morning sun, or in a sunroom with a 40% shadecloth and proper temperature regulation, or even just a few feet away from TWO big 400W grow lamps (for the higher light loving species like vanda and laelia / cattleya alliance) and it can REALLY help boost their growth and sometimes you even get a nice little red color in the leaves! For my normal grow rack operations, I have two T5 LED grow light strips per row, and I try to keep them pretty much right on top of the flasks within a few inches of the top of the flasks, for a pretty high light environment and fast growth. Seed and protocorms in the flask that have not yet turned green do not NEED a light cycle but I think it helps them get started, and I give them just one LED light strip on a normal day/night cycle, a little further away from the flasks for lower light levels. Some terrestrials will need total darkness during the early stages of germination, and some of them will even want near-freezing temps. In general you want STABLE TEMPS for your epiphyte orchid protocorms and seedling babies and they will NOT react well to fast temperature changes or being too hot or cold. I have lost entire species crops simply because the temps rose too fast one day in summer, so now I keep all protocorms ("mother flasks") in a strictly environmentally-controlled "cool room" that never goes below 65f or above 75f. Q: Why do you use the 24oz deli cups? Are the flasks OK to ship to greenhouse operators and other clients in these deli cups? A: Greenhouse operators have mentioned to me that the 16oz deli cups are a little small. They prefer the 24oz deli cups and they prefer the orchids to be big enough to be "touching the top" of the flask, to be considered ready for deflasking. There are exceptions for some more squatty species like dendrobiums maybe, but you want the client to be able to grow out your seedlings and get them to flower within one year, or they won't be happy. Yes, you can ship them out in these deli cups. I open them up, inside the flow hood, and stuff in enough cotton balls to secure the baby orchids inside, for shipping. Q: How many "replates" are usually required? How many seedlings should go into each replate flask? A: I really try to only do one replate and get them big enough to ship, but sometimes due to space limitations or just growth habit of the plants, you'll want to do two. Worst-case scenario is having to do a third replate, but it happens every now and then, especially when you just want a few of a really nice big plantlet variety in a flask. In general you will want to put 30 plantlets in each 24oz deli-cup replate flask, and just let them grow out fast, and ship them! But sometimes if they are small and crowded, you might want to spread out a good 90-100 in a replate and then just plan on doing another replate in around 3-4 months. I don't like to leave the plates longer than 4-6months max without a replate, but sometimes they grow slowly. Sometimes you get an inch thick layer of caviar protocorms in the bottom of the flask from mass-germination, and you want to take some and spread them out on new plates just to help give them space. You need to be AWARE of how much shelf space you have, and you will go through some CULLING of the crop along the way. This is natural and it mimics the natural selection process that occurs in nature. You should pick the strongest, best seed to replate, and make sure to fill your shelves with a variety of plants, not just make 200 flasks of one thing, unless you have it already sold-out with a buyer who you know actually wants that much. In general making 20-40 final replate flasks of each species will be plenty to get you started, which can usually be done just from a a few mothers or even sometimes just from a single good mother flask. In general, 30 seedlings per flask is the golden number. Q: How much agar do you use for your germination plates and your replates? How thick is the layer of agar in the bottom of containers? A: I do 10 plates of germination agar per liter, so the 16oz deli cups have around 95ml to 105ml of fluid, and that usually comes to about 1.5cm depth in the bottom of the 16oz deli cups. For the replates, I give the babies more agar, otherwise they can sometimes eat it ALL up before they get big enough for deflasking! I usually do 8 plates per liter in my replates, so it's more like 120-130ml per plate and it usally comes up more like 2.5cm or so (depth) in the bottom of the 24oz deli cups. Q: How soft or hard should the agar be, in general? A: It should be SOFT! Like a wet jello that has barely set up into jello at all. The purpose of the agar is to provide nutrients and it mainly just needs to be JUST hard enough to be a solid, so they can remain oriented "upwards" in it. In big cloning labs they actually just use liquid medium and the orchids grow just fine, but they constantly agitate the protocorms within the liquid media on "shaker tables" so that the protocorms can never orient "upwards" and this makes them become "protocorm-like bodies" (PLBs) which they can then split many more times, as genetic clone plantlet cells. But for our purpose we want just barely solid agar. I would not advise going above 4.8g per liter and you could even start experimenting with using less than 4.7g per liter (of A111 agar agar from Phytotech labs). Q: How can I secure a more regular supply and variety of orchid seed, and get clients for my flasking business? A: If you want a regular supply of seed, you need to make friends with breeders and greenhouse operators, and that means seeking them out, interacting with them in a positive way, becoming their friends, like in real life. You can also start your own breeding program by learning about your favorite orchids and trying to get a few of them, and learning to make them bloom, and trying to pollinate them by yourself, of course. There's also the "Orchid Seed Sewing and Seed Exchange" group on Facebook, which is a great place to meet other flaskers and to get active in the international seed exchange community. If you want to learn more about terrestrials, I HIGHLY recommend learning about the Pierce Ophrys Conservation Project and actually read "The Conservation of Terrestrial Orchids" by Simon Pierce (it is an amazing treatise on natural breeding cycles of wild orchids), and about Malmgren and the "Malmgren Mix" recipes for Orchys / Ophrys species, and join the "Cardboard Orchids Sewing Group" on Facebook. The flasking community is a small group, even internationally! So you need to be a positive part of the flasker community, offer to send out samples of seed for other flaskers when you have it, and contribute positively back to the community and helping others get started or deal with frustrations like recipes, contamination, and sterile process, along the way. You should post pictures of your succesfull flasks and your lab setup, so other flaskers and potential buyers get to know you and trust you. Reach out to INTERNATIONAL orchid breeders, to find amazing Cymbidium from Torino, or incredible Laelia from Michoacan, or just to meet a guy who runs a vanilla plantation harvest school in a nature preserve in Mexico. Find your local orchid society and become active in it, find your local flaskers and buy them a bunch of good beer at your local brewery! One thing I did was make friends with a lady from Antananarivo, Madagascar and helped her raise almost $1000 for her orchid sanctuary in the Madagascar forest. If you care about orchids, you will eventually learn more and more, and find out about orchid conservationism, and become active in it. This is the way, you will find your own path and feel free to go at your own pace. Being a flasker should make you happy and not just be a chore you do, for money. For me, I love interacting with all the people, learning about all the growth cultures and human cultures that have popped up around orchids all through history, learning about scents, being surrounded by racks full of bright lights and limitless baby orchids to give me life energy. As you transition from being a hobbyist to a pro flasker, you must deal with increasing volumes and demands on your time and budget as you ramp up, and you must learn how to keep it fun, or else you will burn out. I've seen it happen. Q: Can you make real money as a flasker? A: Sure, I calculated that I make around $45 to $60 per hour flasking, but that's only after you've been at it a couple years and you have clients willing to buy your flasks, and a steady source and variety of good seed. You won't make it selling to random strangers on eBay. You'll want to make commission deals with greenhouses and you won't make as much per flask with those deals as you would selling a flask on the open market and making that private sale. Also you will likely not be able to sell their seed flasks to anyone but them, so you'll have a "captive market" so to speak. However when I get good seed, I often have clients try to buy ALL the flasks I can produce of a certain species. Out of courtesy, I also make sure not to sell the same species / hybrids to multiple greenhouse operators within a close geographical region (like multiple greenhouses on the same island in Hawaii for example) because my clients don't like competing against each other on price! You need to provide GOOD PRODUCT with CONSISTENCY in order to become a professional flasker and get those commission deals with the big greenhouse clients, but once it happens you can pretty much flasker for them as a full-time gig if you really want. There is more demand than you can supply, but you have to be cool, and you have to connect with the demand, and that means connecting to PEOPLE who will actually like you and want to work with you, and being a real professional about what you do in the lab, i.e. treating yourself and your operation with professionalism, courtesy and utmost respect for all who interact with it and with you as the representative of your lab. Q: How should I track my seed stock, mother plates, replates, and sales / profitability? A: You should keep a spreadsheet and assign each seed sample, mother flask, and replate flask a UNIQUE ID in your spreadsheet. For example keep headings for each seed sample and where & when it came from, mother platings and results, 1st replates and results, and number/price sold, and then assign rows for each species or hybrid seed sample that comes into the lab. Each seed sample and flask should check into your spreadsheet, and check out again when it either contaminates / dies, or when it sells! Then you can estimate your profitability and keep a good track of what is in the lab at all times, and plan your next rounds of mother platings and replatings on a schedule. Q: What about this thermal printer thing, and heat-shrink bands? A: You can definitely start out just writing flask labels on the flasks with a sharpie or on some little label stickers like these, and using the cheaper silicon tape wrap. But you will definitely get tired of writing those long orchid hybrid names and flask ID codes, eventually! You will want that thermal mini printer for flask label stickers. Now, these thermal pinted labels will FADE especially if you stick them on top of your flasks and then stick the flasks directly under bright LED lights. So you probably should avoid QR codes here and just use nice big alphanumeric flask IDS like for example "MOW-LAELIA-005" or "ANM-BIGGIBUM-015" or something similar, so that you can still read the flask unique ID codes on the stickers after they fade a bit. With the shrink-wrap bands, don't worry about them at first, you can get little lab accessories like that after you have some flasking lab revenue, they honestly don't really save that much time and they are more expensive than the cellophane wrap. Since we are going to open the flasks up and stuff cotton balls in there anyhow to secure them for shipping, the customer will never see this lid "wrap" layer that we use in the lab, anyhow. If you have a specific species and you are interested in making a more specific recipe, check this Orchid Seed & Tissue Culture Media Recommendation Guide from Phytotech Labs, for reference. Also feel free to reach out to us here at Tectractys, via email, at info (at) tectractys (dot) com 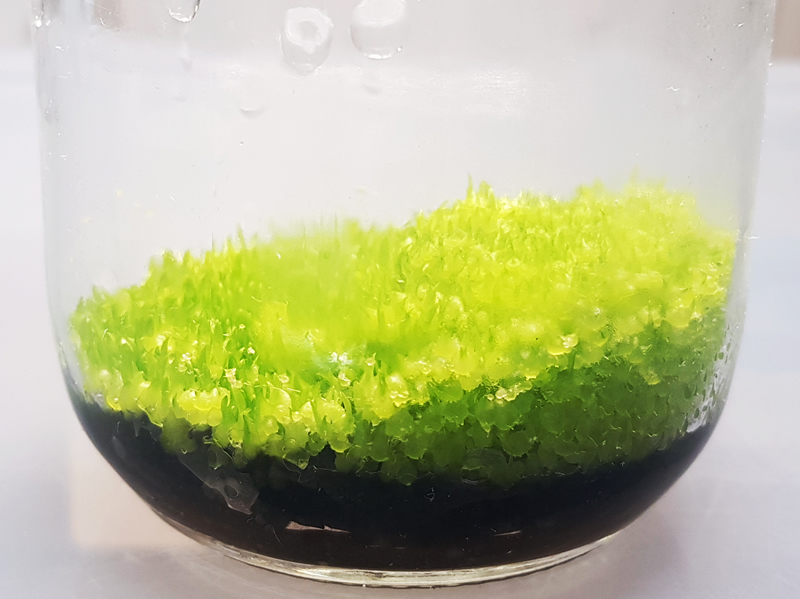 Myrmecophila Galeottiana "mother" flask grown on p668* media at 5.4 pH (10 weeks old) before replating (above) after replating (below) 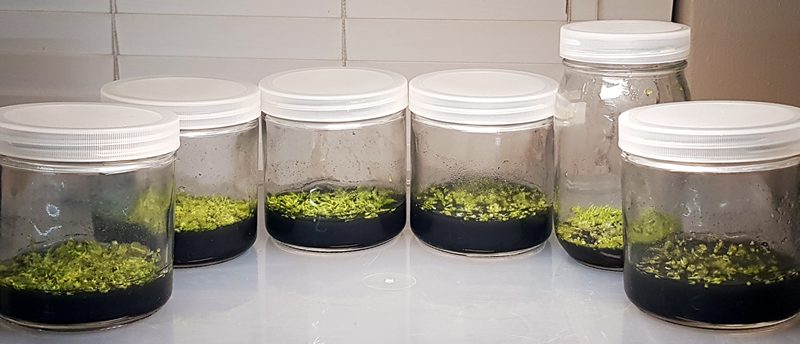 The vaunted "orchid caviar" - you can make it! That's all for now, please check back soon for another installment, where I'll talk about how to flask the seed after sterilization with hydrogen peroxide, and also how to do "green pod" flasking with alcohol flame sterilization. Thanks for visiting! Cheers~ Ryan Molecke | ||||||||||

